How to use Secrets, our password manager
A walk through Secrets from the first login to sharing a password with your family or team, including the one setting I no longer recommend turning on.

Updated November 2026. The screenshots are from 2022, so the Bitwarden apps will look a little different on your screen. The steps are the same.
So you’ve signed up for Secrets (or you’re thinking about it) and you want to know how the thing actually works. Let’s walk through it together, from the first login to sharing the Netflix password with your family.
First, one thing that confuses almost everyone, so let’s clear it up.
Secrets, Vaultwarden and Bitwarden: who is who?
There are three names in this post and they are three different things.
- Secrets is our service. It’s the server where your encrypted vault lives, and we look after it.
- Vaultwarden is the open-source software running on that server. It’s a community project.
- Bitwarden is a separate company that makes very good password manager apps. Their apps are open source and they let you point them at a server of your choice.
Vaultwarden is compatible with the official Bitwarden apps, and that’s why you’ll be installing apps that say “Bitwarden” on them. Vaultwarden is not made by Bitwarden Inc. and neither are we. We’re not affiliated with them. We simply think their apps are the best ones out there.
The part that matters for you: your vault is encrypted on your own device before it’s sent to our server. We store it, but we can’t read it.
Step 1: Create your Secrets account
Head over to the Secrets page and pick a plan. After checkout you’ll get an invite email from hi@ayamsecure.com. Click it, set your master password, and your vault is live. The get started guide covers this part in detail.
A word on that master password. It’s the one password we can’t reset for you (remember, we can’t read your vault). Make it long. A passphrase of four or more random words is a good way to get there, and the get started guide shows you how to pick one.
Step 2: Bring your existing passwords in
No one wants to type two hundred passwords by hand. If you’re coming from another password manager, I’ve written guides for 1Password and LastPass. If your passwords are saved in Chrome or Edge, Bitwarden has a guide for that, and for everything else there’s their general import page.
Step 3: Install the browser extension
This is the piece that makes a password manager feel effortless, so please don’t skip it. Get the Bitwarden extension for your browser from the Bitwarden download page.
Once it’s installed, click the Bitwarden icon, usually at the upper right of your browser.
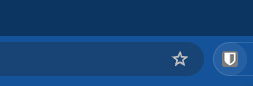
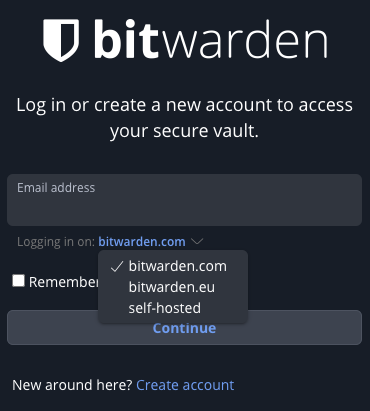
Now, slow down for a moment, because this next bit is the one people miss. Before you log in, you have to tell the app to talk to our server and not Bitwarden’s. On the login screen, open the Logging in on dropdown below the email box and choose Self-hosted.
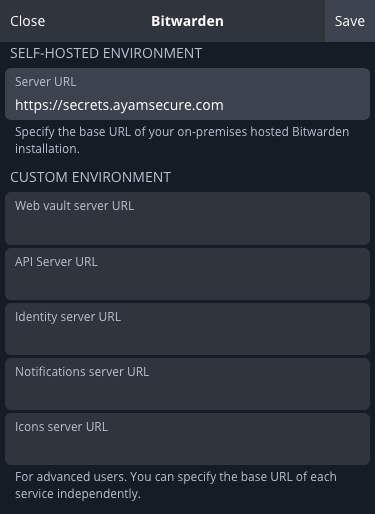
Enter this as the Server URL and click Save:
https://secrets.ayamsecure.com
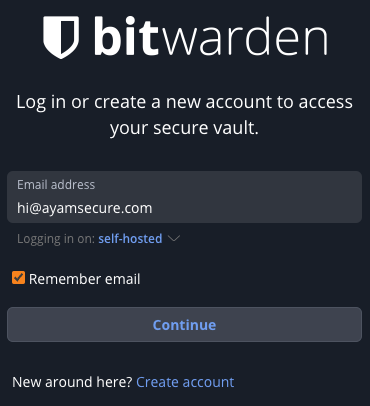
You’ll land back on the login screen. Check that it now says you’re logging in on self-hosted, then enter your email address and continue.
Enter your master password, and your two-step login code if you’ve set one up (please do, here’s how to set it up on your vault).
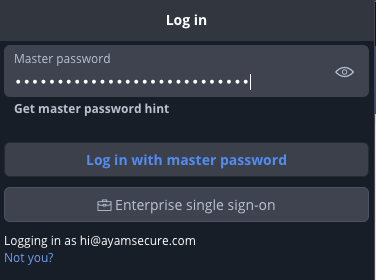
Woo hoo! You’re in.
Step 4: Filling in passwords (and a setting I’ve changed my mind about)
Visit a website you have a login for. Click the Bitwarden icon and pick the login, or use the keyboard shortcut: Ctrl + Shift + L on Windows and Linux, Cmd + Shift + L on a Mac. Bitwarden fills in your username and password.
There’s a nice safety benefit hiding in here. Bitwarden offers a login only when the website’s address matches the one you saved. A lookalike site (think paypa1.com) doesn’t match, so nothing gets offered. If you’re on a page that looks like your bank and Bitwarden is staying quiet, stop and look at the address bar.
Now for the correction. When I first wrote this post in 2022, I told you to go into the settings and make sure Autofill on page load was ticked. That setting fills in your login the moment a page opens, with no click from you.
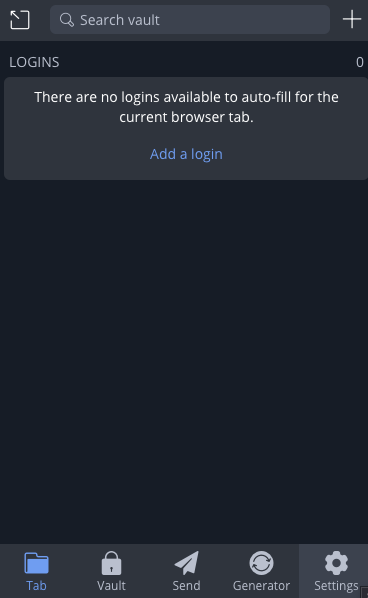
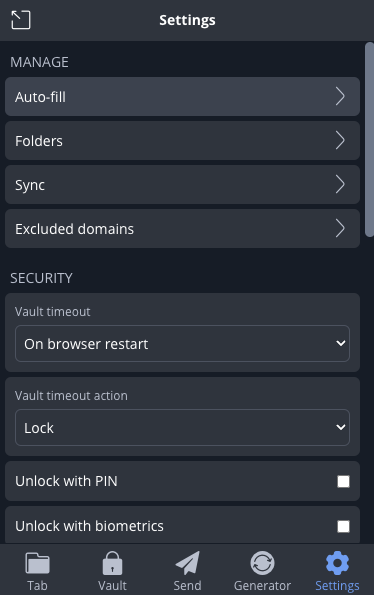
I don’t recommend it any more. Bitwarden ships with it turned off, and their own help page explains why: “compromised or untrusted websites could take advantage of this to steal credentials.” One click or one keyboard shortcut is a small price. So have a look under Settings, then Autofill, and leave that box unticked. (My old screenshot below shows it ticked. Do as I say now, not as I did then.)
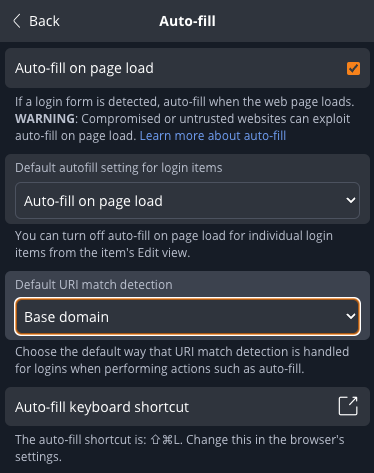
While you’re on that screen, check that Default URI match detection says Base domain. That’s the default, and it means a login saved for https://accounts.google.com is also offered on https://mail.google.com, because both belong to google.com. The other options are for special cases and you can safely leave them alone.
Step 5: Install the phone and desktop apps
The Bitwarden apps for iPhone, Android, Windows, macOS and Linux are all on the same download page. The same rule applies on each one: choose Self-hosted and enter https://secrets.ayamsecure.com before you log in. (The desktop app labels that dropdown slightly differently, but it’s in the same spot on the login screen.)
Step 6: Save a new login
Most of the time you won’t have to do anything. When you log in to a site that isn’t in your vault yet, Bitwarden offers to save it for you.
To add one by hand, open the extension, click the button for a new item (a + or New, depending on your version) and choose Login. Give it a name, the username, the password and the website address, and save.
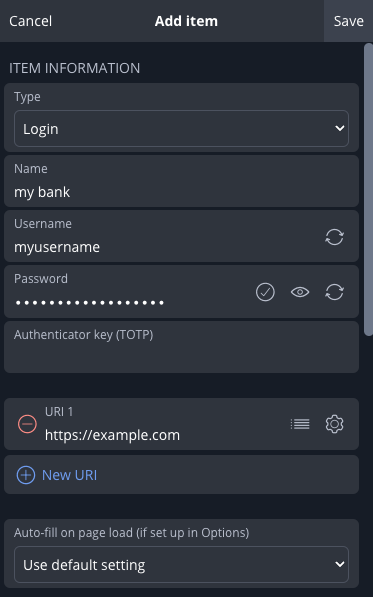
You can sort your logins into folders. To add or rename folders, use the web app at secrets.ayamsecure.com, where there’s more room to see what you’re doing.
Step 7: Let it invent your passwords
This is where a password manager earns its keep. You don’t have to come up with passwords any more, and you don’t have to remember them either. Open the Generator tab and it makes a long random password for you. It can also make a passphrase (a few random words strung together), which is handy for the rare password you’ll have to type by hand, like the one for your Wi-Fi.
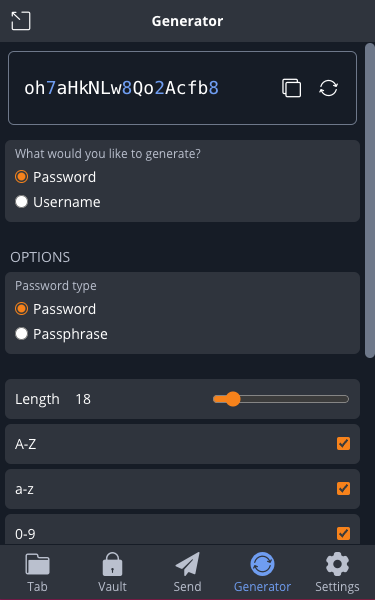
My suggestion: don’t try to change all your passwords in one weekend. Each time you log in somewhere, take one extra minute and swap that site’s old password for a generated one. Start with your email and your bank. In a few months the important ones are done, and it never felt like a chore.
Step 8: Share with your family or team
On a Team plan, you can share logins with the other people in your organization (that’s what the apps call a shared vault). The streaming accounts, the utility company, the shared business logins. I’ve written a separate guide for that: how to use Organizations in Secrets.
That’s it
If you’ve made it this far, you have a vault, an extension that fills in your passwords, and a generator making new ones. That’s most of what there is to it.
If you get stuck anywhere along the way, write to me. I’d much rather answer an email than have you give up and go back to the sticky notes.
Cheers,
Jay